The hideous first build - Rickety Shoerack
Kill it, kill it with fire!
There were at least 7-8 pairs of shoes on the staircase which leads to the terrace at our home, and my mom had complained for eternity that something needed to be done about that.
One fine morning, I decided that instead of buying a nice shoe rack (which, in hindsight, probably would have been cheaper AND better looking), I am gonna build one !
So in spite of vociferous appeals by my parents not to do so, I went out and bought a 5x4 piece of 1/2 inch (12 mm) plywood and prepared a rough plan to build an open shoe rack with 4 racks.
Without much knowledge of woodworking, and armed with a saw, some screws and a drill/driver, I went to work.
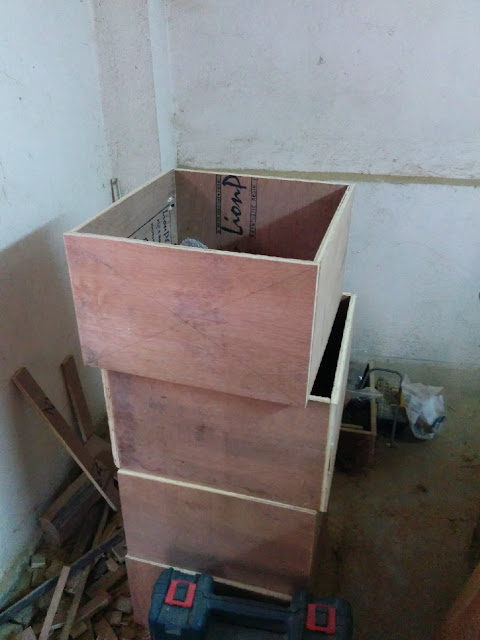
The measurements were off, the racks different in size, the screws driven in incorrectly without pilot holes, and it wasn't probably a good idea to screw the 3 sides (2 sides + 1 back) to the shelves , instead of building a carcass and then putting in the shelves (which I learnt the hard way later).
However, I learnt on every step (about the mistake that I had made on my earlier step that made the current step that much harder), and finally after using all my appendages to hold the sides while fixing them to each other (clamps? what clamps?), I finally managed to hack something together that though being extremely hideous, was stable (thanks to the 50 odd screws - phew!)
Notice the angle from which this photo was taken so as to hide all the yawning gaps resulting from imperfectly measured cuts!
Found some time to glue and nail wooden beading to hide the plywood edges.
Slop some paint onto it.. it'll look good (yeah right!)
So my proud parents (at least they put up a brave face in front of me!) started using the rack freeing the stairs for people to safely climb (surprise!) up to the terrace.
Then a bug bit me that this junk might just look a wee bit better if painted in garish colors (yikes!).
And without much ado, I marched out and bought couple of cans of white wood primer, wood enamel, turpentine oil, couple of brushes and a paint roller.

(From left to right - Turpentine, primer, paint, brushes, and the skeleton of the roller - the foam part is dead after use)
I spent a couple of weekends just slopping on two coats of primer - after some gentle sanding, plywood drinks primer faster than camels drink water in oases, and I spent at least 400 ml of the same on two coats. The Asian paints variety was better (obviously) than the local brand.
At the same time - bought a roll of brown faux wood colored laminate and applied it on the two sides. The waves on the laminates after the glue dried would put the waves of tsunami to shame. Lesson learnt - apply a even coat of glue, and apply even pressure while gluing.
Finally on the third weekend, thinned the paint with turpentine oil (10-15 %) , poured some on a plastic disposable plate (not the thermocol variety), and rolled the rollers.
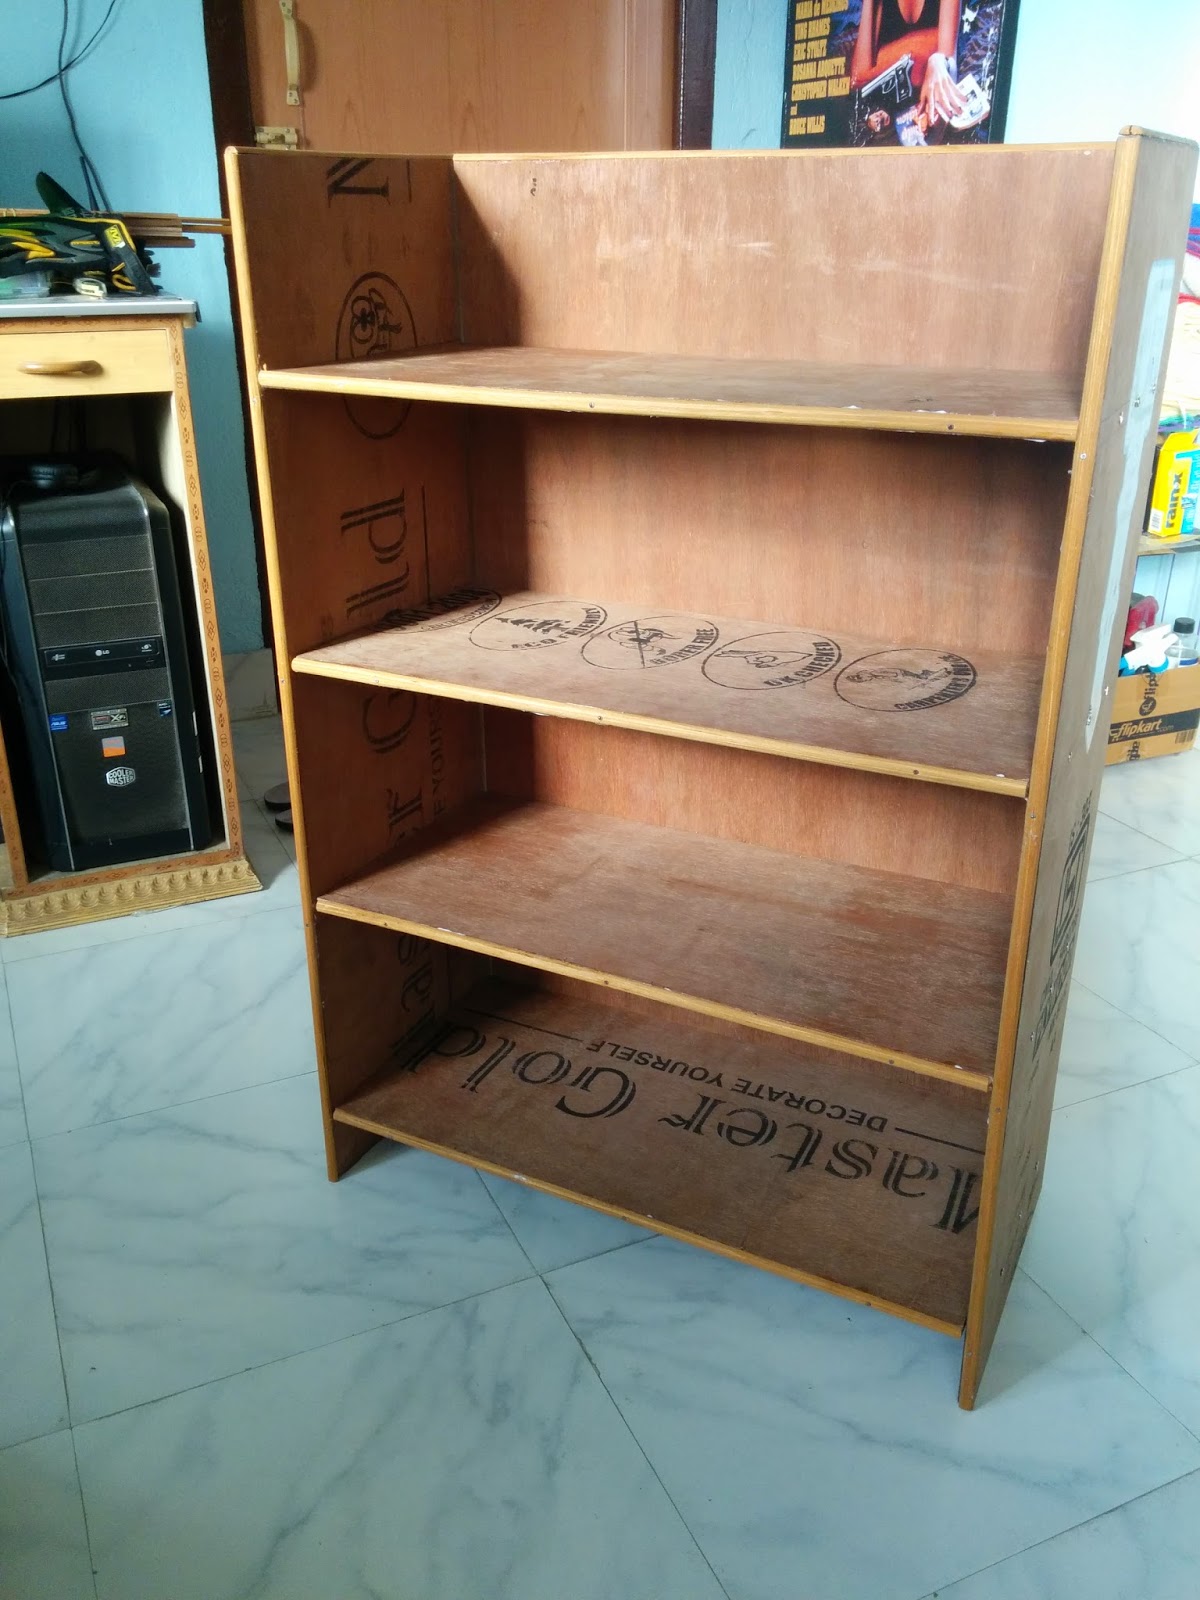
Final condition after 3 coats in 4 nights looked something like this - notice the yawning gaps and bay of Bengal waves on the laminate:


Thankfully, my parents have decided to live with this creation - and unfortunately, this is the first piece of furniture a visitor notices as they climb up the stairs to the first floor.

What do you think of this aberration in an otherwise sane house (or is it?) - do share your thoughts in the comments section.
I'll be back with stories of a slightly better planned cousin of the shoe rack sometime soon.

Nicely done! What are you working on next?
ReplyDeleteDid a few more projects after this one. Too lazy to post them!
ReplyDeleteDo check back in maybe a week.