One for the cause
PAWS (Pashupati Animal Welfare Society, https://www.pawsrescue.in/ ) has been doing wonderful work in the areas of treatment, vaccination & sheltering of stray dogs, despite being fully volunteer funded & perennially cash strapped.
So when they appealed over social media for some basic necessities required to run the show, I decided to pitch in in whatever way I can.
Got to know that the visiting doctor was having difficulties while operating, due to not having a dedicated OT table of proper dimensions. I got in touch with the secretary, Mr. Prasenjit Dutta, and offered to build & donate one to them.
After discussions with Mr Dutta, finalized on the dimensions and shared the sketches with him. The final table would be very close in dimension to what was sketched up.

Started up with sizing the 19mm plywood into pieces (ignore the coconuts !)

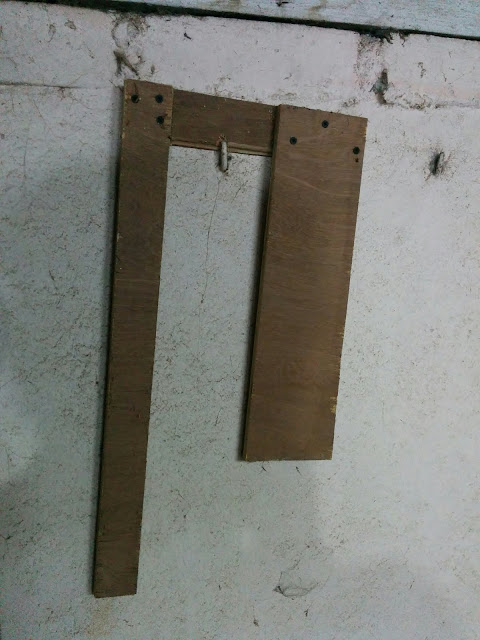
Cut a 45 degree angle into the leg pieces and glued them up. Couple of screws had to be used to maintain straightness. Also had to pull out every clamp I own, and realized once more that I do not have enough clamps.

Legs glued up and ready for action

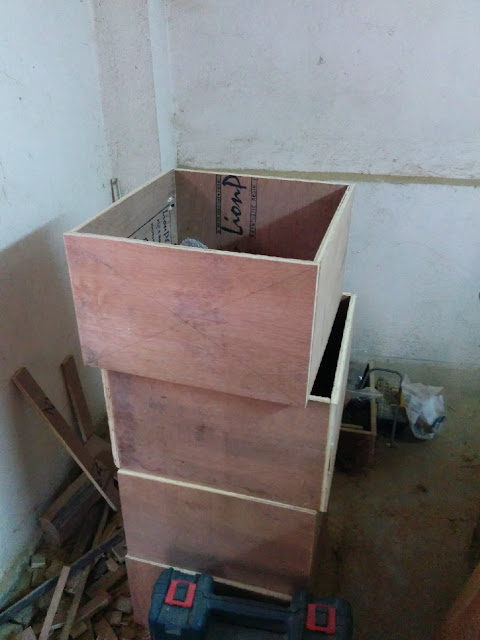
Created the end pieces by gluing + screwing stretchers on the legs. The top stretchers at the ends have 3 pocket holes drilled onto them, as the top shall be attached from below. The top stretchers on the long sides have 4 pocket holes drilled into them for same purpose.

Put the side stretchers in, and we have the carcass ready !

Put in wooden beading (glued + nailed) onto all plywood edges that would be exposed.

Then put in the bottom shelf from 6mm ply (glued + nailed)

Started with wrapping the top piece - got a 3 x 5 ft aluminium sheet, measured to put the top in the middle of the sheet, then cut & folded to wrap the plywood. The sheet is held with a few nails at first to hold it in place, and then screwed in from the bottom (screws + washers) for a tight fit. No glue was used so that in future, if for any reason the surface needs to be changed, its an easy affair.


Started with finishing the carcass thereafter, and after a thorough round of sanding (most boring job if you ask me), I put on the first coat of primer.

Then after a day, another round of sanding and the second coat.

Sanded again and put the first coat of paint by brushing it on.

The final coat was sprayed on using my HVLP sprayer the night before the delivery was due.


Finally, screwed in the top on the morning of the day of delivery, put 4 corner guards so as to reduce the risk of injury and the OT table was good to go in order to be put to use for some just cause.


That very day itself, it was used by the shelter to carry out quite a few sterilization cases, plus other medical requirements.
It's not often you get to attend to more than one of the things you love, by doing only one task. This build helped me achieve that rare bliss.
Dedicated to all the dogs who are fortunate enough to get a forever home, or unfortunate enough to end up in a shelter.
So when they appealed over social media for some basic necessities required to run the show, I decided to pitch in in whatever way I can.
Got to know that the visiting doctor was having difficulties while operating, due to not having a dedicated OT table of proper dimensions. I got in touch with the secretary, Mr. Prasenjit Dutta, and offered to build & donate one to them.
After discussions with Mr Dutta, finalized on the dimensions and shared the sketches with him. The final table would be very close in dimension to what was sketched up.

Started up with sizing the 19mm plywood into pieces (ignore the coconuts !)

Cut a 45 degree angle into the leg pieces and glued them up. Couple of screws had to be used to maintain straightness. Also had to pull out every clamp I own, and realized once more that I do not have enough clamps.

Legs glued up and ready for action

Created the end pieces by gluing + screwing stretchers on the legs. The top stretchers at the ends have 3 pocket holes drilled onto them, as the top shall be attached from below. The top stretchers on the long sides have 4 pocket holes drilled into them for same purpose.

Put the side stretchers in, and we have the carcass ready !

Put in wooden beading (glued + nailed) onto all plywood edges that would be exposed.

Then put in the bottom shelf from 6mm ply (glued + nailed)

Started with wrapping the top piece - got a 3 x 5 ft aluminium sheet, measured to put the top in the middle of the sheet, then cut & folded to wrap the plywood. The sheet is held with a few nails at first to hold it in place, and then screwed in from the bottom (screws + washers) for a tight fit. No glue was used so that in future, if for any reason the surface needs to be changed, its an easy affair.


Started with finishing the carcass thereafter, and after a thorough round of sanding (most boring job if you ask me), I put on the first coat of primer.

Then after a day, another round of sanding and the second coat.

Sanded again and put the first coat of paint by brushing it on.

The final coat was sprayed on using my HVLP sprayer the night before the delivery was due.


Finally, screwed in the top on the morning of the day of delivery, put 4 corner guards so as to reduce the risk of injury and the OT table was good to go in order to be put to use for some just cause.


That very day itself, it was used by the shelter to carry out quite a few sterilization cases, plus other medical requirements.
It's not often you get to attend to more than one of the things you love, by doing only one task. This build helped me achieve that rare bliss.
Dedicated to all the dogs who are fortunate enough to get a forever home, or unfortunate enough to end up in a shelter.

Comments
Post a Comment